Step 1: Export Map Data from Old Mapper

- Log in to the Old Mapper: Access the old mapper using your credentials.
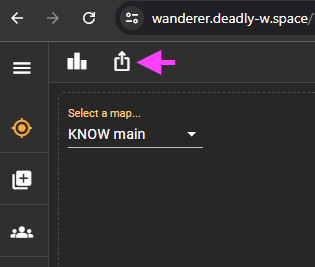
- Navigate to the Map: You should be able to see the export map icon data on top of the map.
- Download the Export File: Save the exported file to your local device. This file should be in a JSON format.
Step 2: Login into New Mapper
-
Log in to the New Mapper: Login button available by invite links only, please contact us if you need to get access.
-
Create a new Map: Add a new map on the Maps page.
-
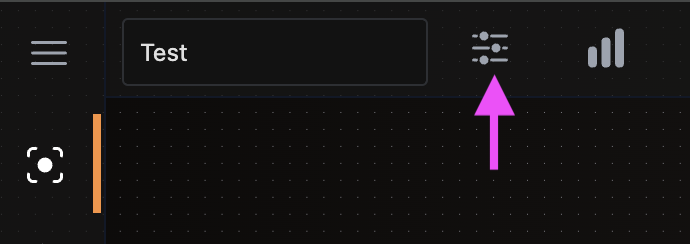
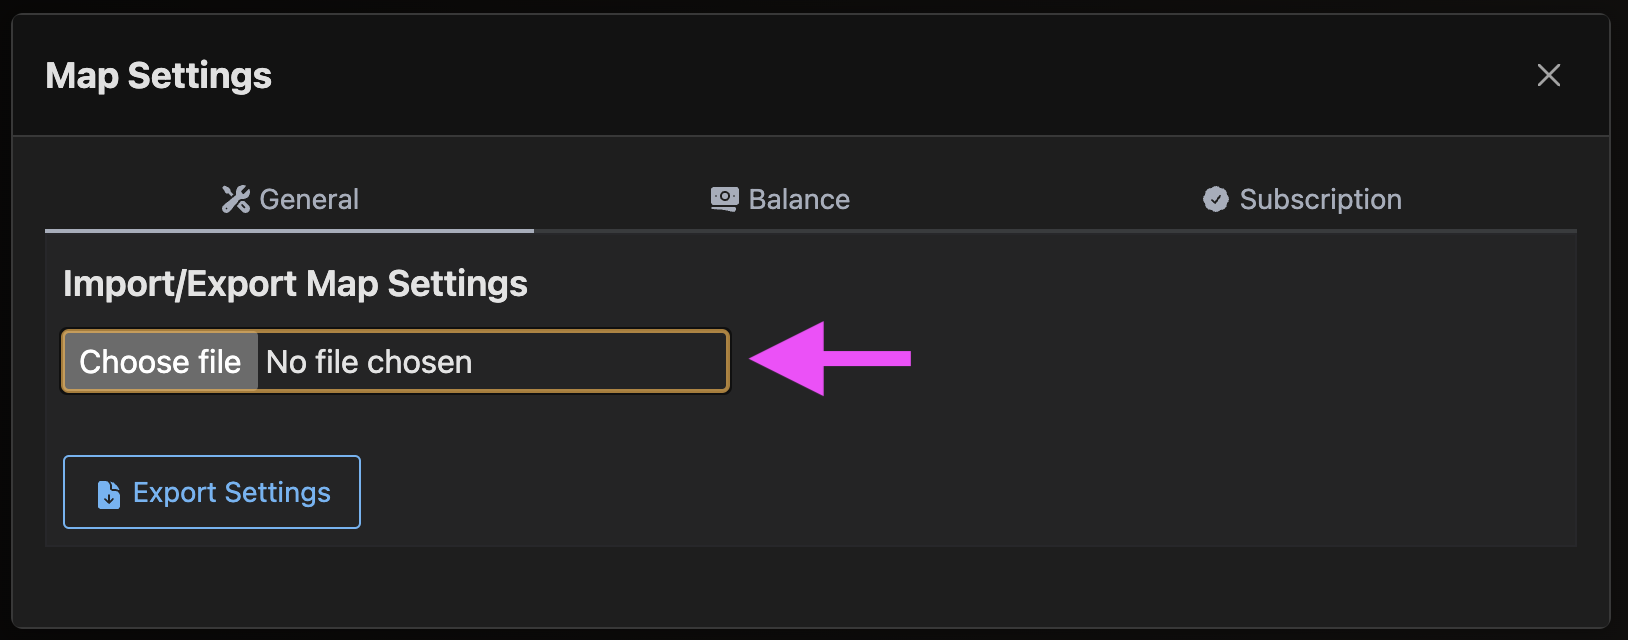
Import map settings file: It should be a map settings icon on the top of the map (available to map owners and administrators only). Select the file you exported from the old mapper and upload it.


-
Wait for map data imported: It should be Importing data Notification appear on the top of the map. Wait until the import is complete. Once the upload is complete, review the imported data to ensure everything has been correctly transferred.

Step 5: Final Checks and Troubleshooting
- Test the New Maps: Conduct a thorough review and test of your maps to ensure they function as expected.
- Troubleshoot Issues: If you encounter any issues, refer to the support documentation or contact our support team for assistance.
Support and Feedback
If you have any questions or need further assistance during the migration process, please reach out to our support team:
We value your feedback and are committed to making this transition as seamless as possible. Thank you for choosing our new mapper, and we look forward to enhancing your Eve Online experience!
Fly safe, The Wanderer Team